




WELCOME TO SHANTOU
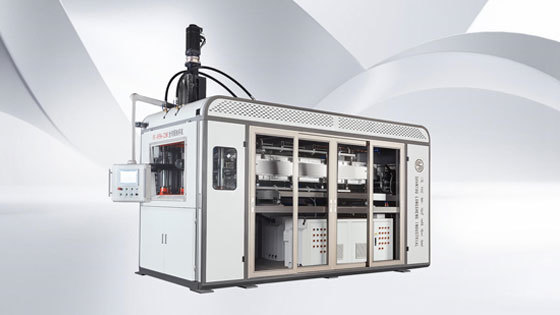
Cup making machine operation instruction
Time: 2024-11-26 11:06:03.686

1. purpose
Standardize the operation process of the cup making process, so that the operator can master the process method.
2. Scope of application
Cup making process and the use of cup making machine.
3. content
3.1 Introduction to cup production process
3.1.1 Sheet on machine
3.1.2 Point move the press button of the sheet feeding chain
3.1.3 Open the automatic switch and start to automatically feed the piece and blow the cup (or take the cup by the manipulator)
3.1.4 Stretching and blowing molding
3.1.5 shearing
3.1.6 Mold separation
3.1.7 Blowing cups (or fetching cups by manipulator)
4 .Operation method
4.1 Before starting:
4.1.1 Check whether there is air leakage or water leakage in the air path and waterway
4.1.2 Refuel the moving part
4.1.3 Clean the machine and the surrounding ground
4.2 When starting up:
4.2.1 Turn on the power: turn on the cooling water, and then press the hot key to start heating.
4.2.2 Prepare the sheet, and determine the sheet feeding distance according to the width of the mold.
4.2.3 When the temperature of the electric furnace rises to the temperature set by the temperature control meter, start the electric furnace and open the air valve.
4.2.4 Wipe the dust and dirt around the sheet with a brush or cloth, then place the sheet under the pressure wheel at the end of the chain, and start to feed the sheet. The width of the sheet is compatible with the width of the end of the chain.
4.2.5 open automatically send switch, automatic send piece, eye observation sheet at this time, through electric furnace heating Master piece of feeding speed, prevent the sheet in the forward speed too slow heat too long, cause sheet concave down electric furnace and easy to cause fire, sent too fast, heat does not reach the designated position, may lead to drop, and make the chain easy to wear and sent to die outside, open automatic switch.
4.2.6 Determine the operation speed of the cup making machine. After the speed is determined, carefully observe each cup in all aspects (shape, cup mouth, cup body, cup bottom thickness, transparency, etc.), and adjust the temperature and the mechanical department according to the situation
4.3 Temperature identification:
4.3.1 low temperature: molding is not good edges and corners are not clear bottom soft transparency is higher.
4.3.2 High temperature: the edges and corners are very clear, the cup body is soft, the transparency is poor, the cup mouth is thin and the bottom is hard.
4.4 Operating points:
Often observe the forming quality of the product, to adjust, the height of the stretching should be just right, the stretching head is too low will make the bottom of the cup is too hard, the stretching head is too high will make the bottom of the cup after forming the cup is too soft, in case of sudden power failure, the machine stops moving or the feeding speed is slowed down, the electric furnace should be immediately withdrawn, and the automatic switch should be turned off.(to prevent the sheet from being heated for too long, concave electric furnace combustion, resulting in black spots causing pollution) find out the cause in time or directly find the mechanic.
In the production process, if there is an emergency, such as foreign bodies in the mold or mold failure, the first thing to do is to turn off the power supply of the machine and close the air valve to discharge the air pressure of the gas storage tank before proceeding.
4.5.1 After the completion of cup making, turn off the automatic switch,and then turn off the electric heating switch, power supply and air valve switch.
4.5.2 Exit the electric furnace and drain the water from the gas storage tank to clean the machine.
4.5.3 The cooling water supply shall be stopped after the machine stops for five minutes.
5. Fault analysis and elimination
The fault analysis of cup making machine generally starts from three aspects: circuit control gas transmission and machine parts damage, and there are more circuit control and mechanical damage.
5.1 When feeding, the sheet falls into the electric furnace.
Cause: 5.1.1 Sheet is unqualified, and the width is small when it is large.
5.1.2 Sheet width and chain width are not coordinated.
5.1.3 The chain press plate is faulty, which is not fixed when loading and the distance of the press plate is not properly adjusted.
5.1.4 Sheet heating is too high and sheet feeding is too slow.
5.1.5 Both sides of the chain are loose and tight.
Solution:
5.1.6 Cut off the unqualified sheet.
5.1.7 Adjust the width of the chain and the width of the platen.
5.1.8 Eliminate pressure plate fault on good sheet.
5.1.9 When feeding the sheet, pay attention to the softening of the sheet after heat.
5.1.10 Adjust the chain so that the tightness of the two chains is consistent.
5.2 The feeding piece stops suddenly or sometimes does not move.
Cause:
5.2.1 Poor circuit contact.
5.2.2 Chain deviation, chain stuck to chain cover.
5.2.3 The chain has been crushed or stuck.
5.2.4 Sheet feeding motor or frequency converter does not work properly.
Solution:
5.2.5 Check the thread end contact point.
5.2.6 Check the chain, chain cover, chain rail, bearing gear and solve.
5.2.7 Find out the dead part of the chain and take corresponding solutions.
5.2.8 Check whether the motor frequency converter is normal.
5.3 The parting and closing die of the mechanical mold is abnormal.
Cause:
5.3.1 Circuit has poor contact, and the close switch of controlling die closing and opening is not in good contact or has been broken.
5.3.2 Mould installation is not accurate, upper and lower mould closing is too tight.
5.3.3 The mold table is not parallel and the guide post is not vertical.
Solution:
5.3.4 Ask the monitor to assist in handling.
5.3.5 Check the amount of lubricating oil and the device, fuel the three fulcrum, and replace it if worn.
5.3.6 The mold shall be reinstalled accurately.
5.3.7 Mold mesa are adjusted in parallel.
5.4 Manufacturing medium cup bottom is too thin and soft.
Cause:
5.4.1 The drawing position is less than, too high or the drawing head is too small.
5.4.2 Uncoordinated running movements.
5.4.3 Improper temperature control.
5.4.4 Mold stomatal exhaust problem or mold leakage.
Solution:
5.4.5 Adjust the stretch position about 3/4 of the cup height.
5.4.6 Observe and adjust each step.
5.4.7 Adjust the temperature properly.
5.4.8 Check exhaust and prevent mold leakage.
5.5 Streaking or patterning at the mouth of the cup.
Cause:
5.5.1 Stretch has become loose (uneven left and right).
5.5.2 Upper die time and forming time are not coordinated.
5.5.3 Mould installation is not accurate.
5.5.4 The running speed of the left and right chains is not synchronized, such as unilateral resistance jump teeth.
Solution:
5.5.5 Flatten the stretch head.
5.5.6 Adjust the upper die delay and molding delay Angle time.
5.5.7 Adjust the chain.
5.6 Weight skew
Cause:
5.6.1 Sheet thickness is biased and temperature is changed.
5.6.2 Chain width is shifted.
5.6.3 Stretching speed has been changed.
Solution:
5.6.4 Determine sheet thickness.
5.6.5 Adjust the chain width appropriately.
5.6.6 Adjust the stretch time reasonably.
5.7 The temperature control meter shows that the temperature drops, but the resulting cup behaves as a high temperature cup.
Cause:
5.7.1 The electric heating plate with probe is damaged or disconnected, and the temperature drops due to no power supply. In order to maintain the set temperature, the temperature control meter keeps heating, resulting in the high temperature cup.
Solution:
5.7.2 Replace the electric heater with probe or reconnect the wire.
5.8 The temperature displayed on the temperature control meter fluctuates greatly from the set temperature
Cause:
5.8.1 The probe wire of the electric heating plate with probe is not in good contact, oxidized or damaged.
Solution:
5.8.2 Check whether the probe wire is in bad contact and oxidized. If the contact is bad, connect it again. Scrape off the oxide layer with the wallpaper knife and connect it again.
5.9 In the normal production process, some cups are suddenly punched and cut continuously in the mold.
The reason:
5.9.1 The water at the upper tool edge of the mold is blocked, resulting in poor water flow and higher temperature of the upper tool edge, thus increasing the thermal expansion of the tool edge and the gap of the lower tool edge, so as to cut continuously.
5.9.2 Lack of oil in the three fulcrum and guide column and excessive resistance lead to poor stroke, resulting in constant punching and shearing.
5.9.3 The proximity switch of the eccentric wheel of the opening and closing die is not in a reasonable position.
5.9.4 The opening Angle time of the punching shear and closing die is too short.
The solution
5.9.5 Clean the upper knife edge so that water can flow smoothly.
5.9.6 Oil the three fulcrum and guide post.
5.9.7 Adjust the opening and closing die eccentric wheel proximity switch so that it is in a reasonable position.
5.9.8 Ask the monitor or manager to help solve, do not understand can not disorderly adjustment, will burn the motor.
5.9.9 Extend the punching and shearing time.
Post Prohibition Ordinance
- It is strictly prohibited to operate in bare arms or shoes or wear slippers
- It is strictly prohibited to extend any part of the body into the punching and cutting mold under the condition of ventilation and electricity of the machine.
- During the operation of the machine, hands and feet are strictly prohibited to reach into any rotating parts of the machine, such as chain, three fulcrum, guide post stretching, cup cylinder, etc., to prevent hands, feet and clothes from being pulled into the chain.
- It is strictly prohibited to reach into the molding mold to take the cup when checking the cup in automatic cup making, and it should be checked in the package.
- Knives, sticks or screws are strictly prohibited to reach into the mold and transmission parts when the machine is running.
- Do not stack anything on the console or cup making machine.
- It is strictly prohibited to debug the stretching height in the working process of the automatic cup making machine.
- When installing or debugging the mold, the speed must be zero.
Shantou Longsheng Industrial Co., LTD.
Related News
Contact Us
China Shantou Longsheng Industry Co., Ltd.
Address:No.44 Xigang Road, Shantou, Guangdong, China
Mob: +86-13302710116
Shiela:+86-15362312727
E-mail: longshengmachine@gmail.com



TikTok